Creating the IPA
The following example is created with XCode5 and iOS7 and explains the process needed to create Ad Hoc provisioned applications. This assumes you have a developer account already configured.
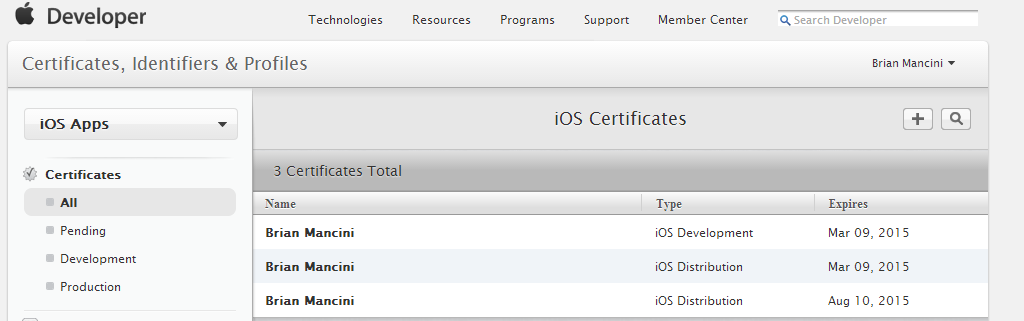
Create your signing certificate
If you don't already have signing certificates you should create them. You can view your signing certificates in member center.
If you don't have any certificates, or you need a new one, Apple provides information in the section Requesting Signing Identities.
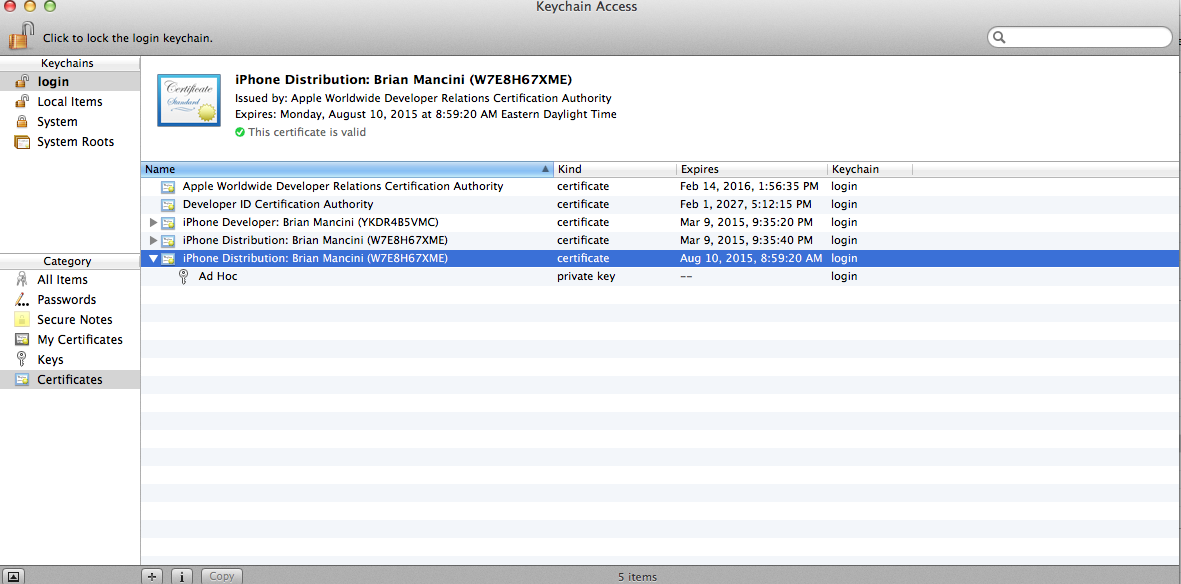
Once you have a certificate in both the member center and your keychain you can continue.
Change build settings to use new signing certificate
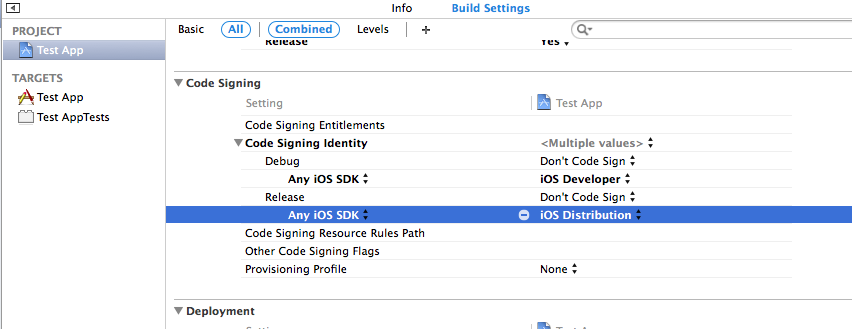
Now that we have a signing certificate, we need to change the build to use this certificate.
I will be using the Release Configuration to create the Ad Hoc application.
The Apple section Your Signing Certificates in Depth explains what these types of settings are.
In short, you'll see a code signing identity for iOS Developer and iOS Distribution scattered through XCode. These reference private keys in your keychain.
To continue, we want to specify the iOS Distribution certificate be used for release builds.
Nagivate to your project and change the code signing identity accordingly.
Create application in Developer Center
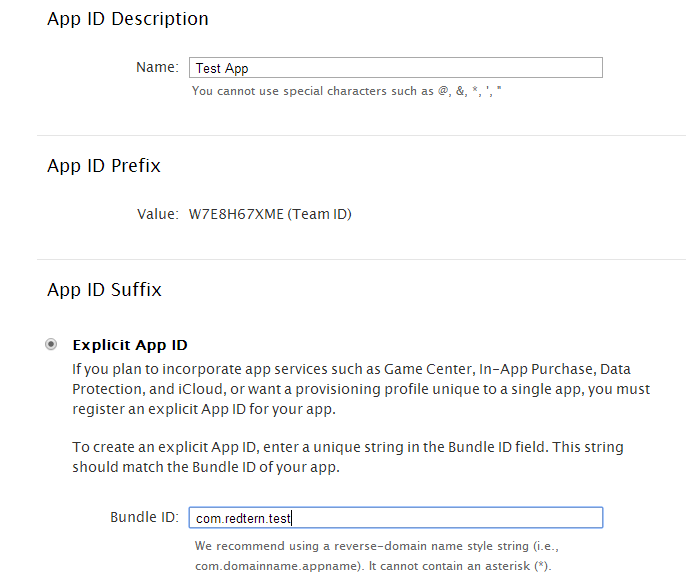
Create the application in Member Center. What is important here is creating a consistent bundle ID as it will need to be entered directly into the bundle identifier for the application.
Update bundle ID in application
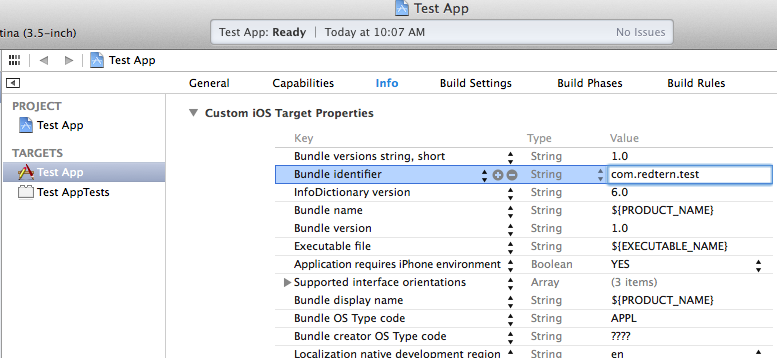
After creating your application in Member Center, the application Identifier will include your team prefix as well as the explicit App ID.
For modifying the application, we will only se it to the value we configured.
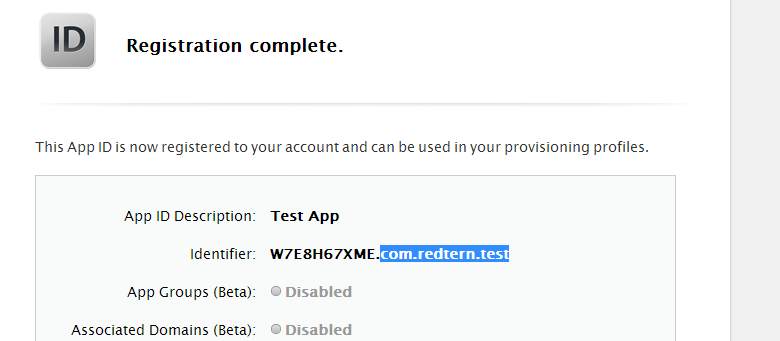
Enter your application's bundle ID as the Bundle idnetifier in the Info section of your Application.
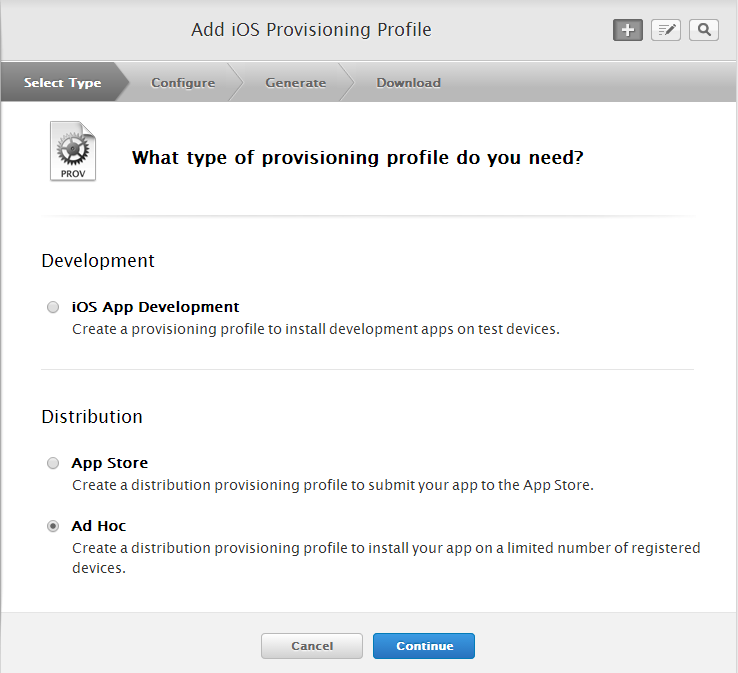
Create provisioning profile
Now you should create your provisioning profile. A prerequisite for this is adding devices to Member Center, which is relatively straight forward.
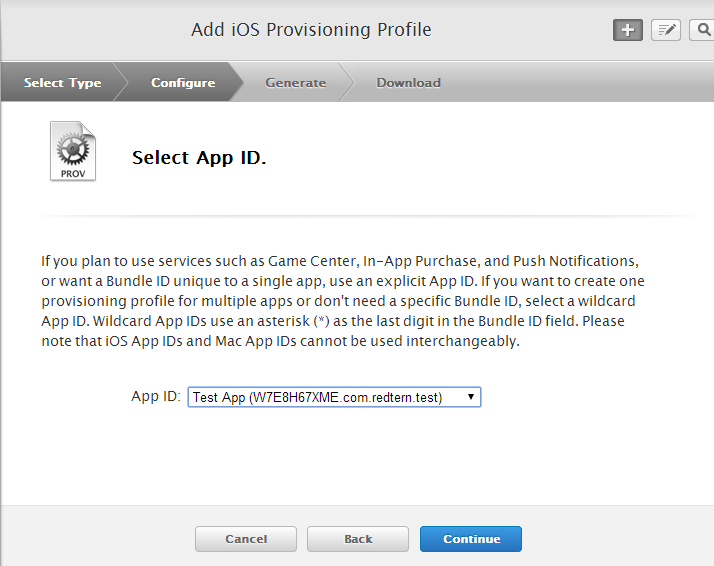
To create a new Ad Hoc Provisioning Profile, in Member Center, select Ad Hoc from the provision type page.
Then select your application that you have configured.
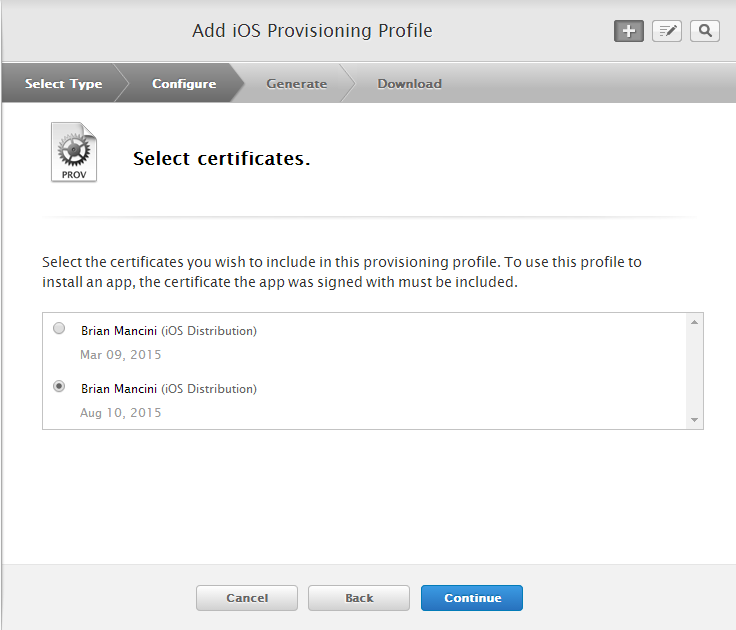
Next you will select the distribution certificate you want to use. This will need to correspond with the certificate in the first step.
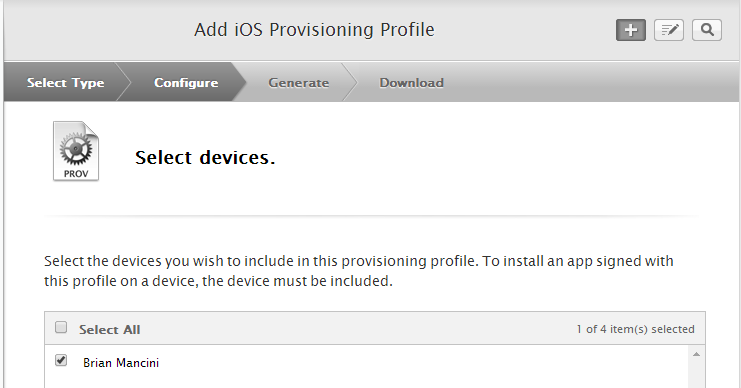
Then select the devices you would like included in the Provisioning Profile
Finally you can generate your Provisioning Profile after naming it.
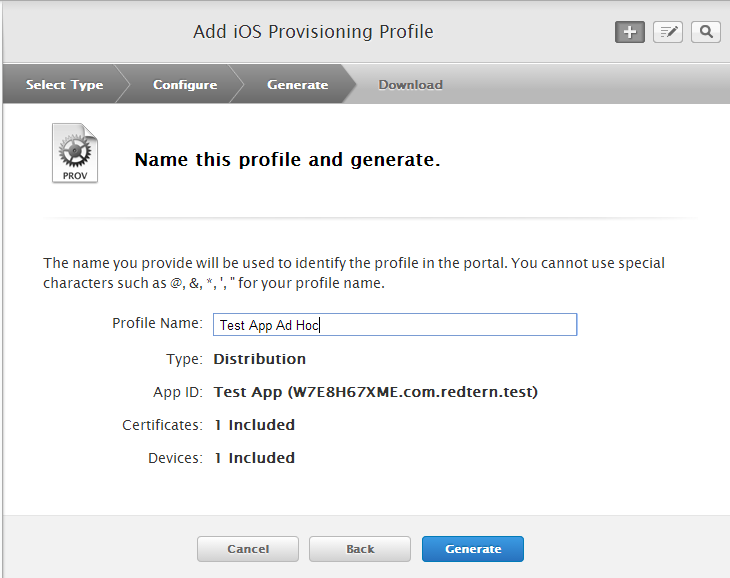
You'll all set up and ready to Archive and export.
Modify Archive to use release configuration
Now we have our application set to sign using the Distribution certificate, and our application matches the Application bundle ID, we need to ensure we archive using the correct configuration
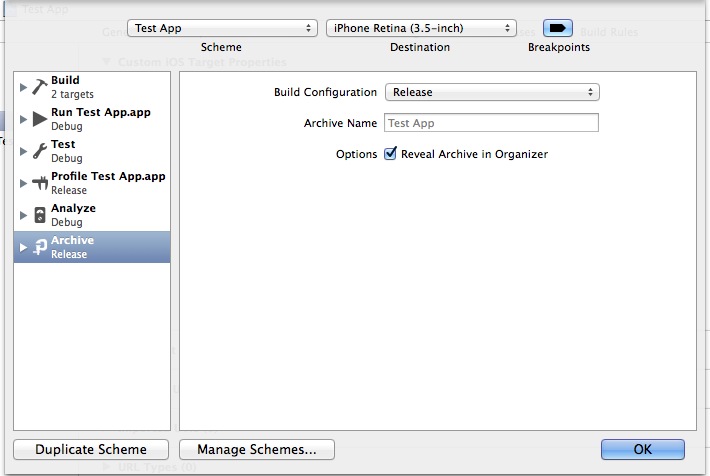
Click on the Target selection and in the upper left and selecte Edit Scheme...
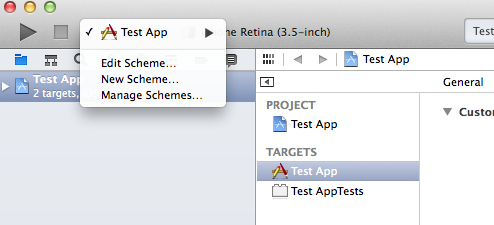
Ensure Archive is configured to use the Release build configuration.
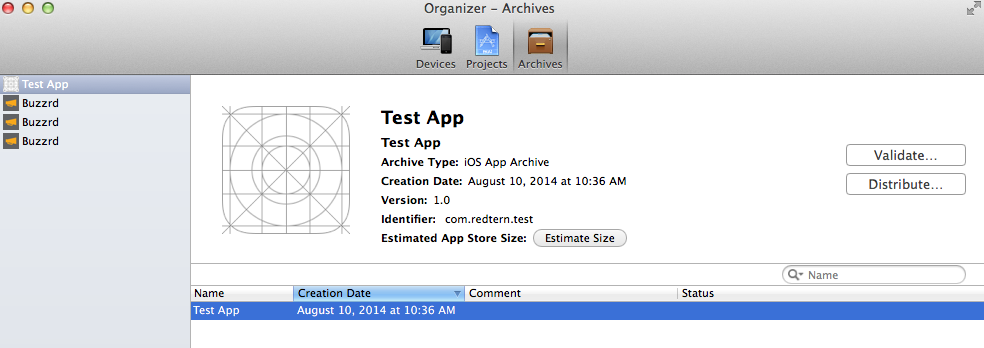
Perform archive
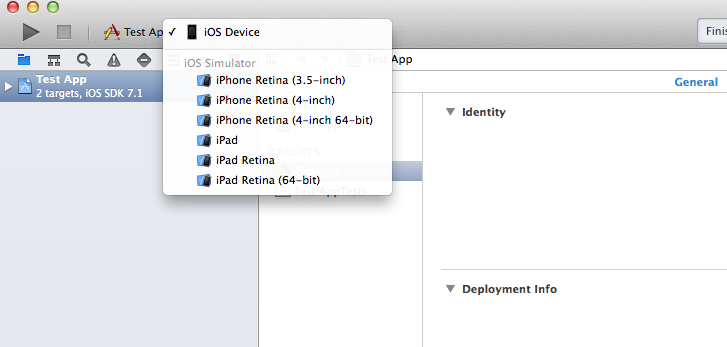
Now we can finally perform the archive! Change the Selected Device to the iOS Device
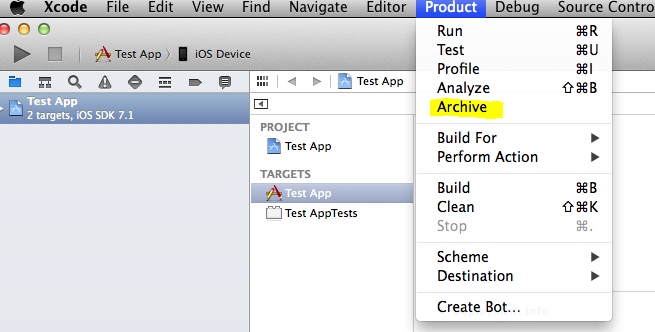
Then you can access Product > Archive in the XCode menu.
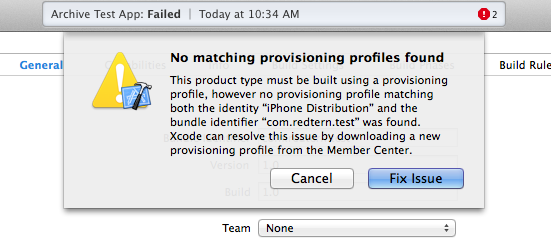
You will likely get an error about "No matching provisioing profile found. This is fine. Click the Fix Issue button and choose your profile.
Sync provisioning profile
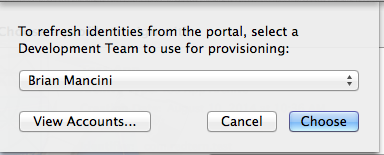
The first time you use the profile it won't be available, so we need to load it.
You'll be presented with an option to choose which account you want to use. Select your account.
You'll then be presented with your Dev account information. Click View Details.
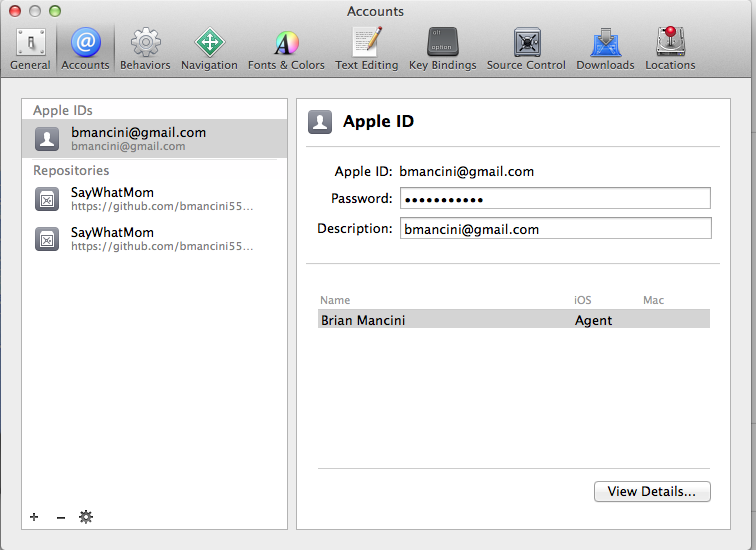
This will display your certificates and provisioning profiles. Click the refresh icon on the bottom left to load the latest profiles.

When you're finished select Done. And continue the Archive process. You should now have a successful archive.
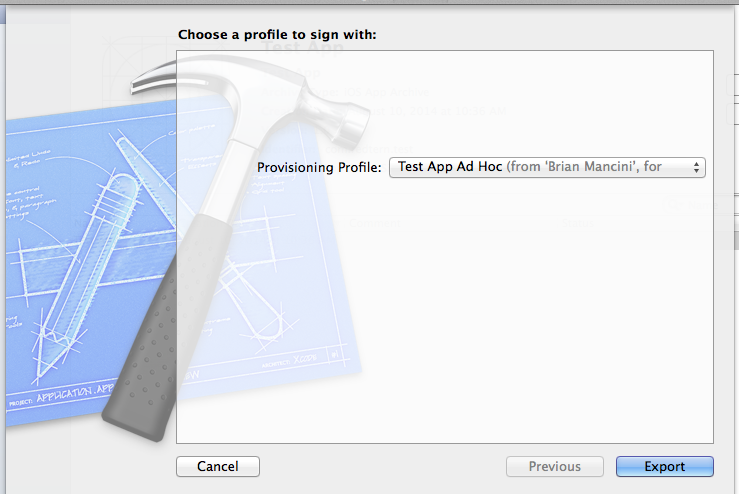
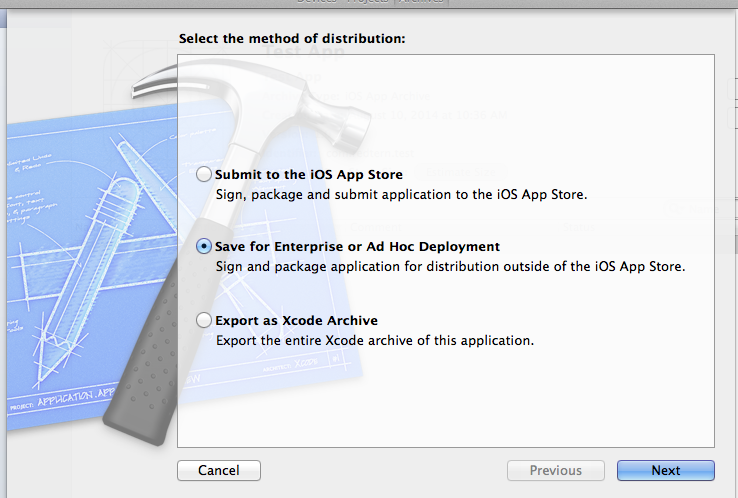
Perform export using provisioning profile
Click the Distribute button. Then Save for Enterprise or Ad Hoc Deployment.
Finally select your provisioning profile.
Note if you have added devices, you'll want to refresh the profile by selecting "Refresh code signing identity"